
HELLER 1/400 BISMARCK
By Len Roberto
The Kit.
This is my first Heller 1/400 kit.
I have had my eye on this range of ships for some time but finally got around to picking one up on ebay.
By the way, ebay is a great source for purchasing model kits.
There are a number of reputable sellers in the ebay community and I have bought from a handful of them repeatedly.
I got the Bismarck kit for $24.99 and it was sealed.
Regular retail is I believe around $39.99.
You get 327 pieces including brass anchor chain (a very nice touch) and the hull is split into two halves down the centerline.
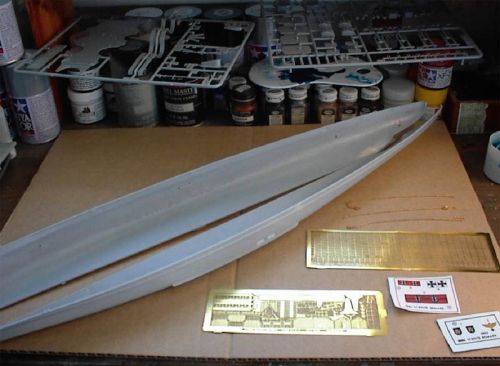
One thing I noticed right away was that the light grayish blue plastic is very soft.
I found this out after gouging out huge chunks of plastic while prepping the first few parts!
Be gentle with your Exacto knife mates.
Overall the molding was nicely done but still, to create a more attractive ship model, a photo etched brass detail set is mandatory.
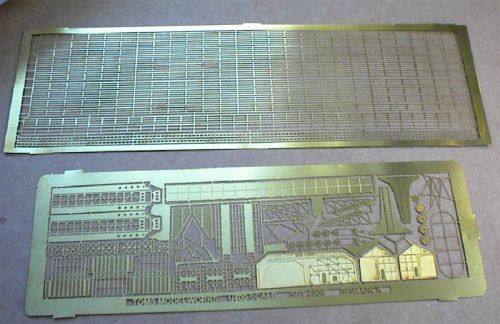
I chose Tomís Modelworkís 1/400 scale set specifically manufactured for this kit (also the Tirpitz kit.)
It offers the modeler finely detailed replacements for such awkwardly molded items like the aircraft catapult, radars (which is just a square piece of plastic), cranes, railings, ladders, hangar doors, and more.
It is impossible for these pieces to be molded in plastic and look believable but in thin etched brass- it makes a world of difference.
Tackling a ship kit of this size is daunting. I like to split up the assembly process by thinking in terms of a bunch of small
models. Each subassembly is worked on and brought to near completion before moving on to another subassembly. The
instructions mainly follow this method anyway; I just like to rearrange the order if possible.
Hull and Deck.
I glued the hull pieces together using the kit provided horizontal braces and the joint braces that go along the
bottom of the hull. The deck is molded in one piece and is nicely done. The very fore part of the deck
(about Ĺ inch) was ripped off and did not make the trip from the factory to my house. I had to use a fair
amount of putty to plug this noticeable hole and sanded for hours. Why is it always the most noticeable area
of your kit that is damaged? I also drilled out about 100 portholes on the hull and on the various other deck
levels and superstructure throughout the model.

I set this aside to dry for a day or two. Since I like to portray my ships underway, the hull had a date with my Dremel tool
and it was cut down to waterline level.
Primary and Secondary Armament.
I next moved on to the guns- the essence of any battleship.
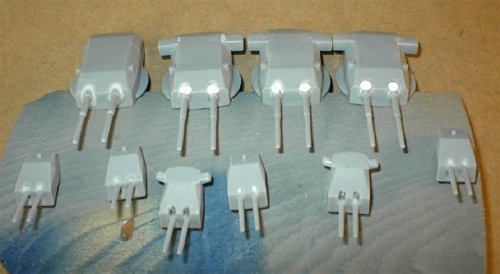
The turrets were nicely done and assembled easily.
The 15-inch gun barrels required a lot of sanding to eliminate the seam lines.
I made two modifications to the four main turrets.
First, I created the blast bags using 2-3 applications of white Elmerís glue (also did this for the secondary armaments) and I used brass vertical ladders on both sides of each turret.
This website offers very useful line drawings to help in placement of details like
these and I also have reference photos taped to the wall of my workshop.
Stack Assembly.
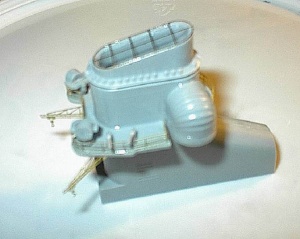
I assembled the stack/funnel assembly next. Construction went smoothly and all parts fit well. The molded
plastic grill was cut out and replaced with the fine brass part. I next replaced the 2 plastic kit cranes with
brass parts. Adding brass railing around the platform- front and back completed this subassembly.
Aft deck and Aircraft Hangars.
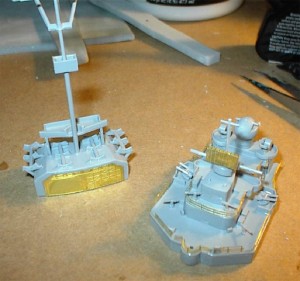
These subassemblies went together easily. Care must be taken with the aft mast due to the softness of the
plastic. I used just a bit too much glue and it lost its straightness. Regluing with Zap fixed this error. As you
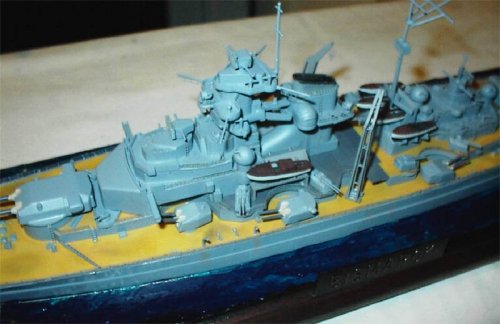
can see in the pictures below, the rear aircraft hangar door in brass makes a big difference compared to a
flat plastic surface with no detail. Also, the plastic kit slab used for the fire control radar looks infinitely
better with its brass replacement. Adding the brass railing and ladders completed assembly here.
Main Bridge Assembly.
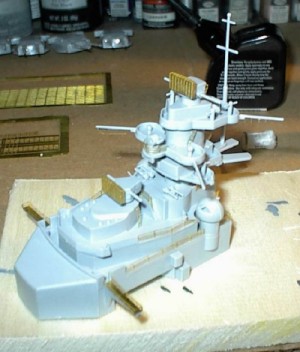
The main bridge and superstructure assembly was next. All parts fit rather well with light sanding required
to make the edges clean. Also a good sanding is needed on the bottom to ensure a gap free attachment to
the deck. Brass replacement parts here are the remaining 2 fire control radars, railing, various ladders, and
the very nice bridge wing extension platforms with railings.
I chose to model Bismarck at anchor just before the start of her sortie. As a result of this decision, I also decided to not
show any aircraft on the catapults and to show some of the shipís boats away. The black/white striped camo scheme was
painted over around May 21, 1941 while in Bergen I believe. I took each main subassembly and the hull/deck and used
Tamiya Acrylic Spray Haze Grey overall. Testors Gunship Grey was used for the front and rear hull portions, the non-skid
armored portions of the deck amidships, and for main battery gun barrels. Tamiya Deck Tan was used for the main battery
blast bags. For the teakwood deck, which has a yellowish tint, I mixed Testors Wood, Flat Yellow, Thinner, and Light Tan.
Painting the deck took the best part of a week. It is slow, tedious, and very deliberate. It took 3-4 different size brushes and
loads of touch-up work.
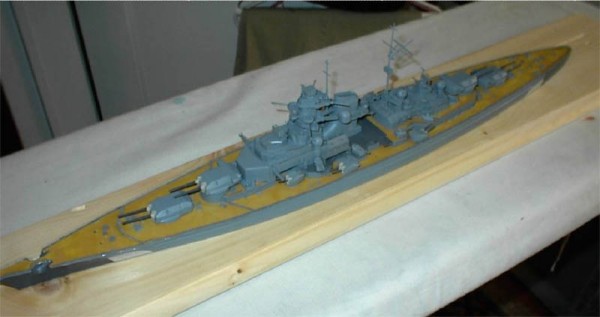
After the deck had dried completely, I used various light colored, earthy toned pastel chalks. I bought a set
of artistís pastel chalks some time ago and these are great for adding texture and depth to a surface with
different hues and shades. I used a yellow chalk and mixed in a flesh and brownish color chalk as well.
Grind these up on a piece of sandpaper. I then used an old battle-worn brush, stick the mangled bristles in
the chalk dust, and proceed to rough up high traffic areas of the deck. Very little is needed of the dust and
it takes a few rubs to see the effect. This lightened and darkened the deck nicely. Once again, I refused to
paint or decal the swastikas, which were present on the bow and stern.
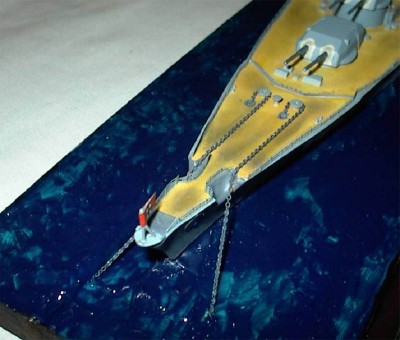
Next it was on to the creation of water. Using Liquitex Acrylic Gel Medium, I created a calm sea on a
converted pine shelf base. The kitís supplied brass anchor chains were painted a black/ dark grey mixture
and using Zap, were attached to their capstans and run out where I squished them into the drying gel.
A light dry brushing of white around where the chains enter the water and along the hull completed the water
painting. A heavy coat of Future Floor Finish gives the water a nice sheen.
Rigging.
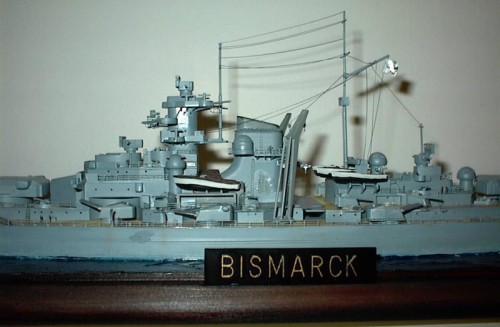
I used black sprue stretched as thin as I could get it for the rigging. Donít worry if they hang over or past
your connection point. When you are done, take a wood match, light a candle, and then use the match end
to melt down the overhangs. The match needs to be relit and be fairly hot. You donít actually touch the
rigging line but the heat of the tip will shrivel and melt the overhang down very neatly. The kit-supplied flags
were attached with Zap to the stern and bow poles and to the rearmost rigging line.
Crew Members.
I never thought I had the patience (or the eyesight) to actually paint and mount brass crew figures. But I
was looking through my pile of unused brass parts from past projects and I spied the set for the Revell
Arizona in 1/426 scale. There were about 40-50 crewmembers on that sheet and I decided to give them a
try. After a dark blue painting and touches of flesh for their faces and hands, I proceeded to place them on
deck with Zap glue. I probably needed a lot more figures but I really like the effect and will try again in the
future. My wife commented that there were not enough guys on the ship and I remarked that most of the
crew was ashore on their final leave...
Conclusion.
This was a great project. The size of the model in 1/400 scale is big enough to give you lots of room for detail work but still
fits in my display case. The brass set added loads of noticeable improvements. As far as price, at $25.00-$40.00- these
Heller 1/400 kits are good for hours of building. Parts fit was good and except for the missing chunk of the bow deck
section, quality was also good. The brass anchor chain is an excellent added benefit with the kit. I can recommend this kit to
all modelers of intermediate or better skills and to ship modelers in particular. If the Tamiya 1/350 Bismarck is unavailable or
a bit too pricey- this kit is an inexpensive and quality alternative.

|


